Leave Your Message

Leave your message now to get your free sample and discount price

How to Choose the Right Ball Rotary Burr?

Choosing the right Ball Rotary Burr can make a small detail easier to shape and a rough edge easier to control. The wrong one may chatter, clog, or remove too much material. This guide explains the choices that matter before you start cutting. Fit matters. So does the finish you want.

Begin with the workpiece. Aluminum, steel, wood, and plastic respond differently to burr shape, tooth pattern, and cutting speed. Check the burr’s material, shank diameter, and stated operating limits against your rotary tool. A burr that fits the collet still needs to run securely and within its rated range. For curved grooves or rounded recesses, compare the ball’s diameter with the space you need to reach. Small heads can enter tight areas, but they may leave marks quickly. Larger heads cover more surface, though they need room to move.

Cut style deserves attention. Coarse teeth can remove material quickly, while finer patterns may give you more control near a finished edge. That is a useful starting point, not a promise: the result also depends on the material, tool speed, and pressure. Keep your grip steady, use light passes, and inspect the surface between cuts. A brief test on scrap can reveal chatter or clogging before it affects the actual piece. There is no single best burr for every task. Even experienced users sometimes need to adjust their choice mid-job. This guide will help you compare options, recognize common trade-offs, and select a Ball Rotary Burr with practical confidence.
How to Choose the Right Ball Rotary Burr?

Identify the Ball Rotary Burr and Its Intended Use

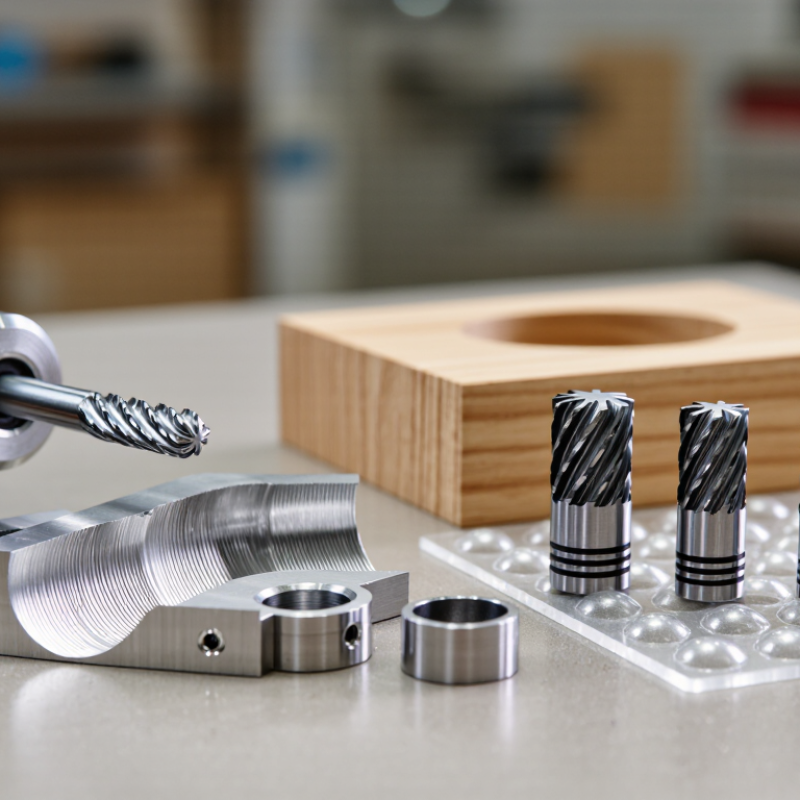
A ball rotary burr has a rounded, spherical cutting head attached to a narrow shank. That shape helps it reach curved recesses, soften inside corners, and form shallow hollows where a flat burr cannot sit cleanly. The cutting edges remove material as the tool rotates; they do not make the burr a precision drill. The shape matters. Check the head diameter and shank size against your rotary tool and the space you need to reach.

Choose the burr for the material and the job. A coarse tooth pattern can remove material quickly from suitable metals, while finer cuts allow more controlled shaping; wood and plastic may need different choices to avoid grabbing or melting. Follow the tool and burr makers’ speed guidance, since a small head can still overheat a workpiece. Secure the piece, wear eye protection, and begin with light pressure on an offcut. Test first. Watch how the surface responds, then adjust speed and pressure rather than forcing the tool. Even experienced hands can misjudge a curve; a ball burr may leave a deeper hollow than intended, and that mistake is not always easy to undo.

How to Choose the Right Ball Rotary Burr? - Identify the Ball Rotary Burr and Its Intended Use

General selection guidance for ball-shaped rotary burrs. Actual availability and recommended operating conditions vary by tool and workpiece.
Selection dimension Typical option or feature Intended use Practical selection note
Burr shape Spherical head with a rounded profile Forming or enlarging rounded cavities, blending curved transitions, and deburring intersecting holes The ball profile is suited to curved surfaces; it is not the first choice for producing a flat bottom or a sharp internal corner.
Head diameter Example sizes: 3 mm, 6 mm, 10 mm, and 12.7 mm (1/2 in) Small heads reach narrow details; larger heads cover more area and suit broader radii or cavities. Check the cavity width and required radius, and leave enough clearance to avoid contacting adjacent surfaces.
Cut style Single-cut, double-cut, or material-specific flute geometry Single-cut patterns are commonly used for general stock removal; double-cut patterns can help produce smaller chips and improve control on many metals. For aluminum and other soft, gummy materials, choose a flute design intended for those materials to help reduce chip loading.
Workpiece material Steel, stainless steel, cast iron, aluminum, or other non-ferrous metal Carbide burrs are used on many metals, but the appropriate cut and operating conditions depend on the material. Match the burr’s cut to the workpiece and consult the tool maker’s guidance, especially for soft alloys and heat-sensitive materials.
Shank diameter Common examples include 3.175 mm (1/8 in) and 6.35 mm (1/4 in) Determines compatibility with the rotary tool, die grinder, or collet. Use a matching collet and secure the shank correctly; do not operate a burr with an incompatible or loose setup.
Reach and access Standard or extended-reach shank Extended reach can access deeper features that a standard-length tool cannot reach. Longer reach increases tool deflection; use a stable setup and avoid excessive side pressure.
Operating speed and technique Speed depends on head diameter, tool rating, material, and setup. Controlled, light passes are useful for gradual material removal and surface blending. Follow the tool and machine speed limits. Wear eye and face protection, secure the workpiece, and avoid excessive pressure or prolonged contact in one spot.

Match the Burr Material to the Workpiece

Choose the burr material for the workpiece, not just the shape of the cut. A tungsten carbide ball burr suits steel, stainless steel, and cast iron, where a tougher cutting edge helps maintain control. Use light pressure and let the tool cut; forcing it can generate heat and chatter. For softer metals such as aluminum, a sharp, single-cut carbide burr can help clear chips and reduce clogging. Clean the flutes often. Small detail, big difference.

High-speed steel burrs can be a practical choice for softer materials and lighter work, but they generally wear faster on hard alloys. For glass, ceramic, or stone, use a diamond-coated burr made for that material, with low pressure and suitable dust control. Diamond coatings are usually a poor match for steel. A perfect chart still cannot predict every cut: coatings, workpiece hardness, and tool speed all matter. Check the tool’s rated speed, secure the workpiece, and test on scrap before shaping a visible edge. If the burr loads up or the surface discolors, stop and reassess the material match or cutting approach.

Choose the Ball Diameter, Shank Size, and Cut Style

Choosing the right ball rotary burr begins with the surface and the detail you need to reach. A small diameter can enter tight curves and narrow recesses, but it removes material slowly. A larger ball covers more area and can smooth broad contours faster. Check the workpiece thickness and access before choosing; a burr that barely fits may chatter or leave uneven marks. Small details matter.

Match the shank to your rotary tool’s collet, not just the burr head. Common shank sizes are not interchangeable, and a loose fit can cause vibration. Fit matters. Keep the shank clean, seat it securely, and follow the tool maker’s speed guidance. I have found that a well-centered burr often feels easier to control than a larger, faster-cutting one. That preference may not suit every job.

Cut style affects how the burr removes material. Coarser cuts usually remove stock more quickly, while finer cuts can leave a smoother surface and need less cleanup. For delicate shaping, start with light pressure and test on scrap from the same material. Watch for heat, clogging, and chatter; each can signal that your speed, pressure, or cut choice needs adjustment. Burr performance varies with material and tool setup, so inspect the finish rather than relying on a label alone.

Check Tool Compatibility and Operating Limits

How to Choose the Right Ball Rotary Burr?

Check Tool Compatibility and Operating Limits

Before fitting a ball rotary burr, match its shank diameter to the collet or chuck. A loose fit can cause runout, vibration, and poor control. Check the tool’s material, cutting geometry, and head diameter against the workpiece and the access you need. Small details matter. A burr that fits the machine may still be unsuitable for the material.

Read the burr’s stated maximum RPM and compare it with the tool’s actual operating speed. Never assume a grinder’s top speed is safe for every burr. Also check the attachment’s condition, the collet’s grip, and any speed limits in the tool manual. OSHA’s abrasive-wheel rules in 29 CFR 1910.215 address abrasive wheels, not rotary burrs; do not transfer those limits to a burr. That distinction is easy to miss.

HSE’s 2023/24 workplace statistics estimate 604,000 workers sustained non-fatal work-related injuries in Great Britain. The figure is not specific to rotary tools, but it reinforces the value of careful setup. Secure the workpiece, use suitable eye protection, and start at a controlled speed. Stop if the burr chatters or feels unstable. I would recheck the collet before increasing speed; it takes little time, and skipping that check is an avoidable gamble.

How to Choose the Right Ball Rotary Burr? Check Tool Compatibility and Operating Limits

Match the burr shank to the tool’s collet or chuck before use. These are common nominal shank sizes; inch sizes are converted to millimeters and may not fit metric collets.

Operating limits: Check the burr’s rated maximum speed and the tool’s speed limit, and never exceed the lower rating. Permitted speed can vary with burr design and head diameter, so follow the product instructions rather than relying on a universal RPM value.

Verify the Burr’s Suitability for the Task

Before using a ball rotary burr, match its shape and cutting style to the job. A rounded head can reach concave areas, open small recesses, and blend curved edges. It is less suited to making a broad, flat surface. Check the burr’s head diameter against the space you need to reach; a large ball may remove material quickly but leave little room for precise control. The shank must also fit your rotary tool securely.

Consider the workpiece material and the finish you need. Burr materials and tooth patterns behave differently on metals, plastics, and wood, so check the tool’s specifications rather than guessing. For fine detailing, a smaller head and lighter pressure usually offer better control. For faster stock removal, choose a cutting style designed for that material, and follow the stated operating limits. That sounds obvious. It is easy to overlook when a job is already underway. Secure the workpiece, wear eye protection, and test the burr on scrap first. Watch for chatter, heat, or a rough finish; these may signal a poor match, excessive pressure, or an unsuitable speed. I still miss this. Pause, inspect the cut, and adjust before continuing.